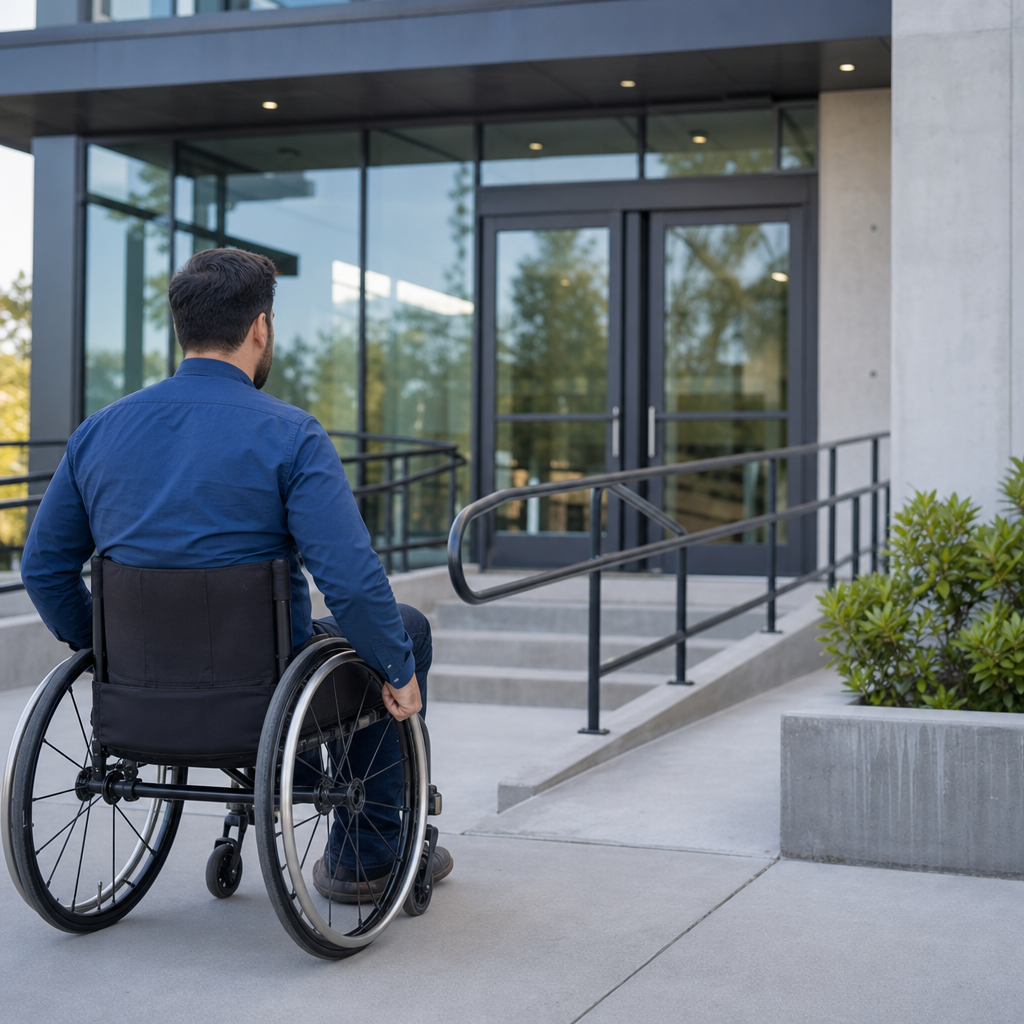

Documenting accessibility issues effectively is one of the most practical self-advocacy skills a person can build, because clear records turn a frustrating barrier into evidence that can be explained, escalated, and resolved. In advocacy work, “accessibility issues” include physical barriers such as missing ramps, communication barriers such as the absence of captions or interpreters, digital barriers such as unlabeled form fields, and policy barriers such as rigid attendance rules that ignore disability-related needs. “Documentation” means capturing what happened, where it happened, who was involved, how it affected access, and what remedy would remove the barrier. I have used this process with schools, employers, landlords, event organizers, and public agencies, and the difference between a vague complaint and a well-documented report is enormous. Good documentation helps you communicate with decision-makers, request accommodations, support internal complaints, prepare for legal or administrative processes, and reduce the emotional burden of retelling the same experience repeatedly. It also strengthens broader disability rights work because patterns become visible when many people document barriers in a consistent way.
As a hub for self-advocacy skills, this guide covers the core practices that make documentation useful, credible, and action-oriented. Self-advocacy is the ability to identify your needs, understand your rights, communicate clearly, keep records, and follow through. Those skills work together. You need observation to notice a barrier, language to describe it, organization to preserve evidence, judgment to choose the right escalation path, and persistence to ask for change. Effective documentation is not about sounding legalistic or confrontational. It is about accuracy, specificity, and problem solving. The best reports answer common questions immediately: What is the barrier? When did it occur? What standard or expectation was not met? Who needs to act? What change would restore equal access? Whether you are preparing for a conversation with a manager, filing a complaint with a disability services office, or keeping a personal record in case the problem continues, the methods below help you document accessibility issues in a way that supports real outcomes.
Start with facts: what happened, where, when, and how it affected access
The strongest accessibility documentation begins with observable facts. Record the date, time, location, platform, event, course, service, or product involved. Name the barrier precisely. Instead of writing “the site was inaccessible,” write “the checkout button on the payment page could not be activated using a keyboard in Chrome on Windows 11 with NVDA.” Instead of “the building was hard to enter,” write “the main entrance on Oak Street had four steps and no ramp, and the side entrance marked accessible was locked at 9:10 a.m.” Specificity matters because it allows another person to verify the issue and understand its impact. It also separates access barriers from general dissatisfaction. Decision-makers can dismiss broad frustration more easily than a concrete, reproducible problem.
Always include impact. In my experience, organizations respond faster when the documentation connects the barrier to a denied task, missed opportunity, safety risk, or unequal experience. For example: “Because captions were not enabled during the staff training, I missed policy updates and could not participate equally in the discussion.” Or: “Because the medical intake form timed out before I could complete it with screen magnification, I had to disclose personal information by phone that other patients could enter privately online.” Impact statements do not need drama. They need clarity. If relevant, note whether the barrier caused delay, extra cost, humiliation, exclusion, physical pain, or loss of independence. That information is often critical in education, employment, housing, healthcare, transportation, and public accommodations.
Collect useful evidence without creating unnecessary risk
Evidence strengthens credibility, but it should be gathered thoughtfully. Screenshots, photos, screen recordings, emails, chat logs, policy documents, appointment confirmations, error messages, and witness statements are all useful forms of evidence. For digital accessibility problems, note the device, browser, operating system, assistive technology, and exact steps that triggered the barrier. If a video lacks captions, save the URL, date accessed, and title. If a PDF is unreadable with a screen reader, retain the file name and where it was downloaded. For physical barriers, take photos that show context, such as the entrance, signage, slope, doorway width, or route to an alternative entrance. A single close-up image often misses the larger access problem.
At the same time, protect yourself and others. Do not record private medical information, confidential student records, or conversations where recording may violate local law or policy. If you are in a workplace or school, preserve evidence through legitimate channels, such as email confirmations and written follow-up notes, rather than by collecting restricted documents. Metadata can matter, so keep original files where possible. When I help people build documentation files, I recommend simple file names that preserve chronology: “2026-05-12_library_elevator_out_of_service_photo1.jpg” or “2026-05-12_training_no_captions_followup_email.pdf.” That naming habit seems minor, but it saves time later when you need to show a timeline. Good evidence is relevant, lawful, and organized well enough that someone else can review it quickly.
Use a consistent incident log to identify patterns
A single incident may be enough to justify action, but repeated barriers become much harder to ignore when they are logged consistently. An incident log is one of the most effective self-advocacy tools because it turns scattered experiences into a pattern with dates, impacts, and prior notice. This is especially important when the issue is intermittent, such as elevators frequently being out of service, interpreters repeatedly not being scheduled, or online coursework becoming inaccessible after platform updates. A log also helps you stay accurate over time. Memory fades, especially when the barrier is stressful or routine. Written records preserve detail and reduce the chance that you will second-guess your own experience.
| Field | What to Record | Example |
|---|---|---|
| Date and time | When the issue occurred or was discovered | March 4, 2026, 2:15 p.m. |
| Location or platform | Building, room, website, app, service, or event | Student portal payment page |
| Barrier description | Objective explanation of the access problem | Form labels were not announced by screen reader |
| Impact | How access, safety, privacy, or participation was affected | Could not submit tuition payment independently |
| Evidence saved | Photos, screenshots, emails, names of witnesses | Screenshot, confirmation email, help desk ticket |
| Who was notified | Person or office informed and method used | Disability services by email |
| Response and deadline | What was promised and by when | IT review promised within five business days |
This format works across settings because it is simple, repeatable, and centered on facts. In practice, I have seen logs make the difference between “we were not aware” and “we can see this has happened six times since January.” They also support future conversations with attorneys, ombuds offices, human resources, disability coordinators, civil rights agencies, or community advocates. If you prefer, keep the log in a spreadsheet, notes app, paper notebook, or secure cloud folder, but use the same fields every time. Consistency is what makes the record persuasive.
Match the issue to the relevant standard, policy, or right
Documentation becomes more powerful when it connects the barrier to a recognized standard. That does not mean you must write a legal brief. It means naming the rule, policy, or expectation that applies. In digital settings, many organizations use the Web Content Accessibility Guidelines, usually WCAG 2.1 or 2.2 Level AA, as the benchmark. If a button lacks an accessible name or color contrast is too low, referencing that standard gives your report structure. In the United States, depending on the setting, accessibility obligations may arise under the Americans with Disabilities Act, Section 504 of the Rehabilitation Act, the Fair Housing Act, the Air Carrier Access Act, or state and local laws. Schools and employers may also have internal accommodation policies, grievance procedures, and procurement standards that matter just as much in day-to-day problem solving.
Use standards carefully and accurately. If you know the exact requirement, cite it. If you do not, describe the barrier plainly and refer to the general obligation to provide equal access. Overstating a legal claim can distract from a valid access concern. For example, if a university lecture video has no captions, your documentation can state that the lack of captions prevented equal access to audio content and conflicts with the institution’s accessibility commitments. If an apartment leasing office only accepts handwritten paper applications that are impossible for some applicants to complete without assistance, document the barrier and request an accessible alternative format. Rights frameworks are important, but the practical goal is clear: identify the obligation, describe the gap, and name the fix.
Write reports that are calm, direct, and easy to act on
The most effective accessibility reports are written so the recipient can understand the issue in one pass and know what to do next. A useful structure is: identify the barrier, explain the impact, attach evidence, reference any relevant standard or prior notice, and request a specific remedy with a timeline. For example: “On April 8, during mandatory compliance training, the video modules did not include captions. Because I am deaf, I could not access the content or complete the training independently. I have attached screenshots and the course link. Please provide captioned versions of the modules and confirm when they will be available.” That format is professional, complete, and hard to misread.
Plain language is an asset. You do not need jargon to sound credible. Avoid long emotional narratives in the initial report, but do not omit meaningful impact. If the barrier created embarrassment, denied privacy, or forced disclosure of disability, say so. Be careful with absolutes like “always” and “never” unless your records support them. If you have reported the issue before, mention that history and attach the earlier correspondence. In my work, follow-up emails sent right after meetings are especially valuable because they confirm what was discussed: “Thank you for speaking with me today. This email summarizes the accessibility issue, the interim workaround discussed, and the repair date you provided.” Those messages create a written record even when conversations begin informally.
Escalate strategically when the first report does not resolve the barrier
Not every accessibility issue is fixed after one email. Effective self-advocacy includes knowing when and how to escalate. Start with the closest responsible party when appropriate: a manager, instructor, property manager, website owner, event organizer, or customer support team. If the response is delayed, dismissive, or incomplete, move to the next level, such as disability services, human resources, a compliance office, a grievance coordinator, an ombuds office, or a government enforcement agency. Escalation works best when you summarize the timeline clearly: when the issue occurred, when you reported it, what response you received, and why the barrier remains unresolved. This shows persistence without forcing the next reviewer to reconstruct the story.
Ask for both an immediate workaround and a permanent fix. For instance, if a workplace intranet is incompatible with screen readers, an interim accommodation might be emailed documents in accessible formats while the vendor remediates the platform. If an accessible entrance is locked, the interim solution may be a staffed access point while the policy is corrected. Be realistic about timelines but firm about equal access. Some repairs require procurement, vendor coordination, or construction, yet delay does not excuse inaction. If retaliation is a concern, document that too. Record changes in treatment, exclusion from meetings, hostile comments, schedule changes, or negative evaluations that follow your complaint. Retaliation issues often depend heavily on chronology, so organized records are essential.
Build a personal advocacy system that supports long-term follow-through
Documentation is most effective when it is part of a broader self-advocacy system. Keep a dedicated folder for accessibility matters. Save policies, accommodation letters, medical documentation when relevant, prior approvals, ticket numbers, and contact lists. Use calendar reminders for follow-up dates and deadlines. If phone calls happen, send a short summary email afterward. If meetings are difficult, bring a support person when allowed or request communication in writing. Templates can help: one for incident notes, one for initial reports, one for follow-up, and one for escalation. This reduces the burden of starting from scratch each time and helps you stay consistent even when the issue is exhausting.
It also helps to know when outside support is useful. Disability resource centers, protection and advocacy agencies, legal aid organizations, independent living centers, unions, patient advocates, and community groups can all help review documentation and suggest next steps. You do not need to wait for a crisis to organize your records. In fact, the best time to build your system is before you need it urgently. Strong self-advocacy is not just speaking up in the moment. It is recognizing barriers early, recording them accurately, understanding your options, and maintaining a paper trail that supports accountability. That combination gives you leverage, protects your memory, and makes it easier for others to help effectively.
Learning how to document accessibility issues effectively gives you a practical, repeatable method for turning barriers into action. The essential steps are straightforward: record the facts, describe the impact on access, preserve relevant evidence, keep a consistent incident log, connect the issue to the right policy or standard, write clear requests, and escalate when needed. These are foundational self-advocacy skills because they work across school, work, housing, healthcare, transportation, public services, and digital spaces. They also help you move from reactive frustration to informed problem solving. Well-documented issues are easier to fix, harder to dismiss, and more useful if you need formal support later.
Just as important, strong documentation benefits more than one person. When barriers are recorded consistently, organizations can see patterns, improve systems, and prevent the same harm from recurring. That is how individual self-advocacy contributes to broader rights and inclusion. Start small if necessary: create a simple log, save screenshots, and send one clear follow-up email after the next barrier you encounter. Over time, those habits become an advocacy toolkit you can rely on. If you are building your self-advocacy skills, begin by setting up your documentation system today and use it the next time access is denied.
Frequently Asked Questions
What information should I include when documenting an accessibility issue?
Start with the basic facts: what happened, where it happened, when it happened, and how it affected access. A strong record usually includes the date, time, location, organization or service involved, and a clear description of the barrier itself. For example, instead of writing “the website was hard to use,” document the exact issue: “On March 12 at 2:15 p.m., the checkout form on the organization’s website had unlabeled fields, so my screen reader announced only ‘edit box’ without identifying what information was required.” That level of detail makes the problem understandable to someone who was not present.
You should also note the impact of the barrier. Explain what you were unable to do, what delays or risks it created, and whether you had to rely on another person, give up privacy, miss an opportunity, or abandon the task altogether. This is especially important because decision-makers often respond more quickly when they understand not just that a barrier exists, but that it blocked equal participation. If possible, include objective supporting details such as screenshots, photos, copies of emails, error messages, links, names of staff members involved, or written policies that contributed to the issue.
It is also helpful to document what response you received when you tried to address the problem. Record who you spoke with, what you requested, what they said, and whether any action was taken. This creates a timeline and shows that the issue was identified, communicated, and either resolved or ignored. Good documentation does not need to sound legal or formal. It just needs to be accurate, specific, and organized enough that another person could understand the barrier and verify what happened.
How can I describe an accessibility barrier clearly and persuasively?
The most effective approach is to focus on observable facts first and conclusions second. Describe what you encountered in concrete terms that anyone can picture. If the issue is physical, explain the barrier precisely: “The building entrance had four steps and no ramp or lift.” If the issue is communication-related, say what was missing: “The event included spoken instructions, but no live captions or ASL interpreter were provided.” If the issue is digital, identify the exact failure: “The submit button could not be reached using keyboard navigation alone.” Specific language is more persuasive than general statements because it gives the reader something actionable to verify and fix.
After describing the barrier, connect it to the access problem it created. In other words, explain the consequence. A persuasive record might say, “Because there were no captions, I could not follow the presentation content in real time,” or “Because the attendance policy did not allow disability-related flexibility, I was penalized for symptoms beyond my control.” This cause-and-effect structure is powerful because it shows that the issue is not a preference or inconvenience, but a barrier to equal access.
It also helps to keep your tone calm, direct, and professional, even if the experience was frustrating or upsetting. You can absolutely describe the seriousness of what happened, but avoid vague emotional language as your main evidence. Instead of writing “This was terrible and unacceptable,” lead with facts, impact, and any steps you took to seek resolution. That style tends to be more effective with employers, schools, service providers, landlords, and agencies because it makes your documentation credible, usable, and harder to dismiss.
What evidence is most useful when reporting accessibility problems?
The best evidence is anything that shows the barrier as it existed at the time and supports your description of its impact. For physical barriers, useful evidence may include photographs, video, building layouts, appointment notices, parking details, or signage. For communication barriers, keep copies of event announcements, registration pages, interpreter or captioning requests, and any responses showing whether accommodations were denied, delayed, or ignored. For digital barriers, screenshots, screen recordings, browser information, device details, and notes about assistive technology used can be extremely valuable.
Written records are especially important. Save emails, text messages, chat transcripts, support tickets, letters, and meeting notes. If you spoke to someone by phone or in person, write down the date, time, the person’s name and role, and a summary of what was said as soon as possible afterward. This kind of contemporaneous note can be very persuasive because it captures details while they are fresh. If policies are part of the problem, save copies of the relevant rule, handbook language, website page, or official notice so you can show exactly how the policy created a barrier.
When collecting evidence, focus on accuracy and privacy. Do not alter screenshots beyond basic labeling, and keep original files when possible. Organize materials by date so they create a clear timeline. If your documentation includes sensitive health, educational, or employment information, store it securely and share only what is necessary for the complaint or request. Strong evidence does not need to be dramatic; it needs to be reliable, relevant, and directly connected to the access problem you are trying to resolve.
How should I organize accessibility documentation so it can be used for advocacy or complaints?
A simple, consistent system works best. Many people find it helpful to create one folder, notebook, or digital document for each issue, then organize everything chronologically. Start with a summary page that identifies the barrier, the setting, the dates involved, and the current status. After that, maintain a timeline listing each incident, each communication, and each follow-up step. This structure is useful because it lets you quickly understand what happened and provide a complete record if you need to escalate the matter to a supervisor, disability services office, HR department, licensing board, or legal advocate.
Within that file, separate materials into clear categories such as incident notes, correspondence, screenshots or photos, policies, witness statements, and outcomes. Label files consistently so they are easy to retrieve later. For example, use names like “2026-05-14-email-request-for-captions” or “2026-05-16-screenshot-unlabeled-checkout-form.” If you are documenting repeated barriers, create entries for each occurrence rather than combining everything into one vague summary. Patterns matter. Repeated incidents can demonstrate that the problem is ongoing, systemic, or the result of a flawed policy rather than a one-time mistake.
It is also wise to include a section for your requested solution. Document what would provide effective access, whether that means repairs, captions, alternate formats, policy flexibility, staff training, or a different process. Advocacy is often more successful when documentation does not only prove the problem, but also points toward a reasonable remedy. Well-organized records save time, strengthen credibility, and make it much easier for supporters, investigators, or attorneys to understand the issue without having to reconstruct events from scattered messages and memories.
When should I escalate an accessibility issue, and how can documentation help?
You should consider escalation when the barrier is serious, repeated, time-sensitive, or ignored after you have made a reasonable effort to report it through the usual channels. Escalation may also be necessary when the issue involves safety, exclusion from essential services, retaliation, or a policy that clearly prevents equal access. In many situations, a problem can be resolved quickly with direct communication. But if the response is dismissive, delayed, or incomplete, documentation becomes the foundation for taking the next step with confidence and clarity.
Your records help because they turn a frustrating personal experience into a documented pattern of facts. A strong escalation packet might include a concise summary of the issue, a timeline of events, copies of emails and requests, photos or screenshots, names of staff contacted, the impact on your access, and the remedy you are seeking. This allows a supervisor, compliance office, agency, or advocate to review the matter efficiently and see that the concern is specific, supported, and unresolved. Good documentation also reduces the risk that details will be minimized, forgotten, or reframed later.
When escalating, be direct about what outcome you want and by when. For example, you might request captioning for future meetings, an accessible website fix, a revised attendance exception process, or access to an alternative entrance until a permanent repair is completed. If deadlines matter, say so. If the barrier caused harm such as missed instruction, lost income, delayed care, or loss of privacy, include that as well. Documentation cannot guarantee a positive outcome, but it substantially improves your ability to explain the issue, demonstrate its impact, and push for an effective resolution instead of another vague promise.