Adding captions to videos is one of the most practical ways to make content accessible, searchable, and easier to understand across platforms. In plain terms, captions are synchronized text displayed on screen that represents spoken dialogue and, when done well, meaningful sounds such as laughter, applause, alarms, or music cues. They differ from transcripts, which present the full spoken content in document form, and from subtitles, which are often translated text for viewers who can hear the audio but do not understand the language. In accessibility work, these distinctions matter because the right format solves a different problem for a different audience.
I have added captions to training libraries, marketing videos, webinars, and short-form clips, and the same pattern repeats every time: teams underestimate the impact until they see watch time improve and support requests drop. Captions help Deaf and hard of hearing viewers access information independently. They also help hearing viewers in noisy gyms, quiet offices, airports, classrooms, and social feeds where videos autoplay on mute. Multiple studies from platform publishers and video marketing reports have consistently shown that many users watch with sound off at least part of the time, which means captions are not a niche feature. They are basic usability.
For a hub article on captioning and transcription tools, the main goal is to answer two questions clearly: how do you add captions step by step, and which tools make the process reliable at scale? The short answer is this: start with a clean source video, generate a transcript manually or with speech recognition, edit for accuracy, sync the text to timecodes, export in a standard format such as SRT or WebVTT, upload the caption file to your video platform, and then review playback on desktop and mobile. That sequence works whether you use YouTube Studio, Adobe Premiere Pro, Descript, Rev, VEED, Kapwing, Otter, or a broadcast-grade workflow. The sections below break down the process, tool choices, standards, and quality checks so you can publish captions that are accurate, readable, and genuinely useful.
What Good Captions Include and Why Accuracy Matters
Good captions do more than mirror words. They identify speakers when it is not obvious, preserve meaning during interruptions, and include relevant non-speech information. If a smoke alarm sounds off camera and that sound affects the scene, the caption should communicate it. If a presenter says, “No, we cannot ship Friday,” but automatic speech recognition outputs, “Now we can ship Friday,” the entire meaning flips. Accuracy is not cosmetic; it is informational integrity.
Industry expectations are shaped by accessibility law, platform guidelines, and quality benchmarks used in education and media. In the United States, the FCC, ADA-related accessibility practices, and Section 508 compliance efforts have all influenced how organizations think about captions, while the Web Content Accessibility Guidelines provide widely recognized standards for synchronized media alternatives. In practical production terms, most professional teams aim for very high verbatim accuracy, sensible line breaks, readable timing, and consistent punctuation. Auto-generated captions are a starting point, not a finish line. Even the best speech engines struggle with names, jargon, accents, overlapping dialogue, and poor audio.
Readable captions usually stay on screen long enough to be comfortably processed, break at natural linguistic points, and avoid covering essential visual information. I typically correct product names, people’s names, and domain-specific terminology first because those errors are common and damaging. For example, a medical training video might transcribe “atrial fibrillation” incorrectly, and a software tutorial might turn “GitHub repository” into nonsense. One careful pass by an editor familiar with the subject often delivers a dramatic quality jump.
Step-by-Step: How to Add Captions to Any Video
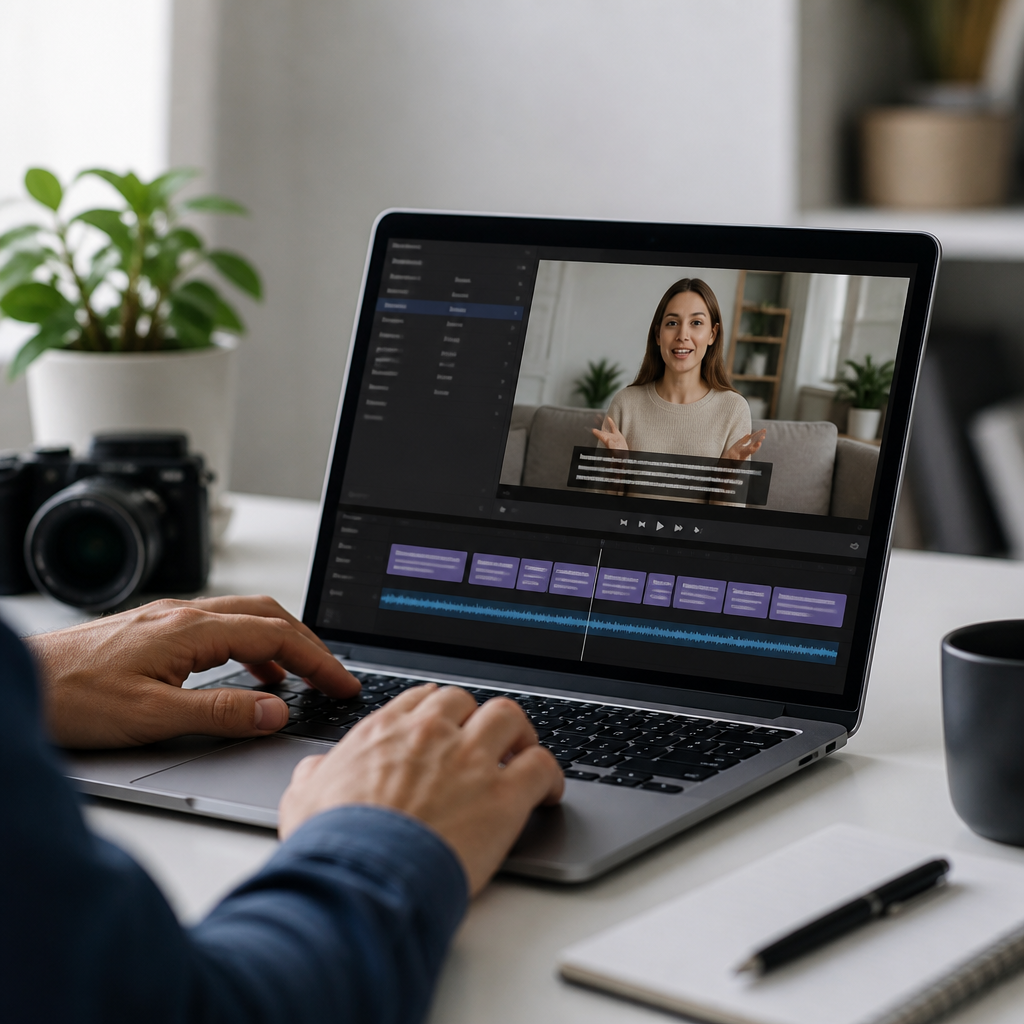
The fastest dependable workflow is straightforward. First, choose the final video version. If you caption before editing is locked, every trim can shift timing and force rework. Second, create a transcript. You can type it manually, use built-in automatic transcription in tools like YouTube Studio, Premiere Pro, or Descript, or order human transcription from services such as Rev. Third, edit the transcript for accuracy, punctuation, speaker labels, and sound cues. Fourth, synchronize the text to the video timeline. Fifth, export the captions in the format your platform needs. Sixth, upload and review the result on the actual playback surface where viewers will watch.
When I train teams, I tell them to think in three layers: words, timing, and packaging. Words means the transcript is correct. Timing means each caption appears and disappears when it should. Packaging means the file type, naming, language tag, and upload settings are right. Most caption failures happen because one of those layers is skipped. A marketing team may approve the transcript but forget to sync it, or a social team may burn captions into the video for Instagram but neglect to upload a sidecar file for YouTube where users expect closed captions they can toggle.
| Step | What to Do | Recommended Tools | Common Mistake |
|---|---|---|---|
| 1. Lock the edit | Finalize cuts before captioning | Premiere Pro, Final Cut Pro, DaVinci Resolve | Captioning a rough cut, then redoing timing later |
| 2. Generate transcript | Create text from speech manually or automatically | Descript, YouTube Studio, Otter, Rev | Trusting automatic text without review |
| 3. Edit text | Fix names, jargon, punctuation, and sound cues | Descript, Subtitle Edit, Amara | Ignoring terminology and speaker changes |
| 4. Sync captions | Align text with start and end timecodes | Premiere Pro, Subtitle Edit, Kapwing | Captions flash too quickly or lag behind audio |
| 5. Export file | Save as SRT, VTT, SCC, or platform-specific format | Most editors support SRT and VTT | Uploading the wrong format for the platform |
| 6. Publish and test | Review on desktop and mobile, with sound on and off | YouTube, Vimeo, LinkedIn, LMS players | Assuming one successful preview equals full QA |
If you need a simple universal answer, use SRT first. An SRT file is the most commonly accepted caption format across major platforms. It contains numbered caption blocks, timecodes, and text. WebVTT is also common, especially for web video, and supports additional styling options in some environments. Broadcast and enterprise systems may require more specialized formats such as SCC or TTML, but for most creators publishing online, SRT and VTT cover the majority of use cases.
Choosing the Right Captioning and Transcription Tools
The best captioning tool depends on volume, budget, turnaround time, and your accuracy target. For creators who want a free starting point, YouTube Studio can auto-sync or auto-generate captions and lets you edit them in the browser. It is useful for long-form video and easy publishing, but I would not treat it as a final quality solution for technical content without manual correction. For web teams, Kapwing and VEED offer approachable browser-based editors with caption styling, fast export, and team-friendly workflows. They are convenient for short-form social clips, though fine timing control can be less precise than in desktop editing software.
For professionals already working in post-production, Adobe Premiere Pro is often the most efficient place to caption because the transcript, sequence, and export settings live in the same project. Premiere’s Speech to Text has improved significantly, and the text-based editing workflow saves time on interviews, webinars, and tutorials. Descript is another strong option, especially when teams want transcript-centered editing, overdub-related workflows, and collaborative review. I have used Descript effectively for podcasts with video because the text and media stay tightly linked during revisions.
When accuracy matters more than speed, human services remain valuable. Rev, 3Play Media, and similar vendors can provide human-created captions or human-reviewed machine output. Educational institutions, public agencies, healthcare organizations, and legal teams often prefer this route for compliance and risk management. Otter works well for meetings and rough transcription, but it typically needs more editorial cleanup before publication. Subtitle Edit and Aegisub are respected by power users who want detailed control over timing and formatting, especially when budget is tight and technical comfort is high.
As the hub for captioning and transcription tools, this topic also connects naturally to adjacent articles your readers may need next: how to choose between captions and transcripts, best speech-to-text apps, SRT versus VTT, how to caption Zoom recordings, and how to check caption accuracy. Those supporting pages should link back here because this guide provides the decision framework behind all of them.
Editing Captions for Readability, Accessibility, and Platform Fit
Editing is where acceptable captions become useful captions. Start by correcting proper nouns, acronyms, and specialized vocabulary. Then review line length and timing. A caption that is technically accurate but overloaded with text forces viewers to choose between reading and watching. In practice, concise segmentation matters. If a sentence is long, split it across successive frames at natural pauses. Keep speaker labels brief, use brackets for meaningful sound cues, and avoid decorative styling that reduces contrast.
Closed captions and open captions solve different distribution problems. Closed captions are uploaded as a selectable text track. Viewers can turn them on or off, platforms can index them, and you can swap languages without re-rendering the video. Open captions are burned into the picture. They are always visible and work well on platforms that mute autoplay or offer poor caption support, such as some ad placements or social reposts. The tradeoff is inflexibility: if you discover an error later, you must export the video again.
Platform behavior matters more than many teams realize. YouTube handles sidecar caption files well and gives viewers language and playback options. Vimeo supports multiple text tracks and is common in professional portfolios and training libraries. Instagram Reels and TikTok prioritize on-screen readability in a vertical frame, so burned-in captions often perform better visually, but placement must avoid interface overlays. Learning management systems and corporate video portals can be inconsistent, so always test with the actual player your audience uses, not just the edit suite preview.
Translation adds another layer. If you need subtitles in multiple languages, create and approve the source-language captions first. That reduces cost and preserves timing structure. Many teams make the mistake of translating from an unedited auto-transcript, which multiplies errors downstream. A clean English master, for example, becomes the reference for Spanish, French, or ASL-related support materials and simplifies vendor coordination.
Quality Checks, Common Problems, and Long-Term Workflow Tips
A reliable caption QA process should be boring in the best way: repeatable, documented, and easy for anyone on the team to follow. I recommend a final review checklist that includes audio-text accuracy, synchronization, speaker identification, sound cues, punctuation, file format, language tag, and playback testing on desktop and mobile. Watch once with sound on to compare speech and captions, then once with sound off to judge whether the text alone carries the message. That second pass catches surprising gaps.
The most common problems are easy to predict. Automatic captions often miss brand names, surnames, and technical terms. Fast dialogue creates unreadable caption speed. Music or crowd noise lowers transcription accuracy. Editors sometimes caption filler words inconsistently, which can affect tone. Another frequent issue is drift, where timing gradually slips out of sync over a long recording after an edit or frame-rate mismatch. If captions seem fine at the start but wrong near the end, check whether the video was transcoded or exported at a different frame rate than the captioning session assumed.
For teams producing video regularly, build a reusable workflow. Maintain a terminology list with product names, speaker names, and industry terms. Store caption files alongside source media in organized folders, not in someone’s downloads directory. Decide when to use machine-first plus human edit versus fully human captioning. Assign ownership for QA before publishing, not after complaints arrive. If accessibility is part of procurement, check whether your chosen video platform supports multiple caption tracks, keyboard controls, and transcript display. These are operational details, but they determine whether accessibility survives beyond one good intention.
Adding captions to videos is not just a production task; it is a communication standard that improves access, comprehension, and reuse across every major channel. The process is simple when broken into stages: lock the edit, create the transcript, correct it, sync it, export the right file, and test playback where your audience actually watches. Choose tools based on your accuracy needs and volume, not just convenience. Browser apps are excellent for speed, desktop editors are strong for control, and human review remains the safest option when mistakes carry legal, educational, or reputational risk.
As a hub for captioning and transcription tools, this guide should be your starting point whenever you publish video for the Deaf community or for any audience that benefits from clearer access to information. Strong captions make videos usable without sound, improve discoverability, support translation, and reduce friction for everyone. The next practical step is simple: pick one existing video, caption it using the workflow above, and review the result with sound off. That single exercise will show you exactly where your process needs improvement and how much value accurate captions add.
Frequently Asked Questions
What is the difference between captions, subtitles, and transcripts?
Captions, subtitles, and transcripts are closely related, but they serve different purposes. Captions are on-screen text synchronized with the video’s timing, showing spoken dialogue and, ideally, important non-speech audio such as laughter, applause, music cues, doorbells, alarms, or background sounds that affect meaning. This makes captions especially important for accessibility, because they help viewers who are deaf or hard of hearing fully understand what is happening in the video.
Subtitles are also synchronized text on screen, but they are usually intended for viewers who can hear the audio and simply need the dialogue in another language or want help following speech. Because of that, subtitles often focus on spoken words only and may not include meaningful sound descriptions. A transcript, by contrast, is a full text version of the audio content presented as a document rather than timed text on the screen. Transcripts are useful for reading, searching, repurposing content into blogs or show notes, and improving discoverability, but they do not replace captions when someone needs synchronized text while watching the video.
In practical terms, if your goal is accessibility and a better viewing experience across platforms, captions are the right choice. If your goal is translation, subtitles are usually what you need. If your goal is reference, documentation, or content reuse, transcripts are the best fit. Many high-quality video workflows include all three.
Why should I add captions to my videos if my audience can already hear the audio?
Captions benefit far more people than many creators realize. Even when viewers can hear perfectly well, captions make videos easier to consume in real-world situations where audio is limited, unclear, or inconvenient. People watch videos on mute in public places, offices, classrooms, waiting rooms, and during commutes. They also rely on captions when audio quality is poor, when the speaker has a strong accent, when multiple people are talking, or when technical terms and names are difficult to catch on the first listen.
Captions also improve comprehension and retention. Viewers often process information better when they can hear and read at the same time, especially in educational, instructional, or fast-paced content. This is one reason captions are so effective in tutorials, interviews, webinars, product demos, and social media videos. They reduce friction and make it easier for people to stay engaged from beginning to end.
From a visibility standpoint, captions can support searchability and content performance. While captions themselves are not identical to transcripts, the text associated with your video can help platforms understand what your content is about. That can improve discoverability, indexing, and opportunities for repurposing content into articles, summaries, and clips. In short, captions are not just an accessibility feature; they are also a usability, engagement, and distribution advantage.
What are the exact steps to add captions to a video?
The basic captioning process is straightforward, even though the exact buttons vary by platform or editing software. First, prepare a clean version of your video and make sure the audio is final. Captions should be added after the spoken content has been locked, because even small edits to the audio can throw off timing. Next, either create a transcript manually, generate one using automatic speech recognition, or upload your video to a tool that creates draft captions for you.
Once you have the spoken text, the next step is syncing it to the video. This means breaking the text into caption segments and assigning accurate start and end times so each line appears when the words are spoken. Most captioning tools let you do this manually or refine automatically generated timing. After timing is set, review the text carefully for spelling, punctuation, speaker changes, technical vocabulary, and sound cues. If relevant, add descriptions such as “[laughter],” “[music playing],” or “[door closes]” when those sounds contribute to understanding.
After editing, export the captions in a standard format such as SRT, VTT, or another platform-supported file type. Then upload that file to the video hosting platform, video editor, LMS, or website where the video will be published. Finally, test playback on desktop and mobile to confirm the captions are synchronized, readable, and enabled correctly. If you are publishing on multiple platforms, it is worth checking each one individually, because line breaks, styling, and caption behavior can differ.
If you want the simplest workflow, use a captioning tool that combines auto-generation, editing, and export in one place. If you need the highest possible accuracy, especially for training content, legal material, healthcare information, or branded content, plan time for a full human review before publishing.
How accurate do captions need to be, and what makes captions “good” quality?
Captions should be as accurate as possible. For professional or public-facing content, the goal should be very high accuracy, because even small mistakes can confuse viewers, distort meaning, or make the content feel unpolished. Good captions correctly reflect what is said, appear at the right time, and remain on screen long enough to be read comfortably. They also use punctuation, capitalization, and sentence breaks in a way that helps viewers follow the meaning naturally.
High-quality captions do more than transcribe words. They identify different speakers when necessary, include relevant sound cues, and avoid cluttering the screen with too much text at once. They should not lag behind the audio or appear too early. They should also preserve important context, such as a change in tone, off-screen speech, or a sound effect that explains what is happening in the scene. In educational and instructional videos, accuracy is especially important for names, product terms, numbers, commands, and step-by-step directions.
Automatic captions are a helpful starting point, but they are rarely perfect on their own. Background noise, overlapping voices, industry jargon, accents, and poor microphone quality can all reduce accuracy. That is why the best practice is to edit auto-generated captions before publishing. A strong final review should check wording, timing, readability, formatting, and accessibility. If a viewer can follow your video clearly without sound and still understand who is speaking and what is happening, your captions are probably in good shape.
Should I use auto-generated captions or create them manually?
For most creators, the best approach is to use auto-generated captions as a starting point and then manually review and correct them. Automatic captioning tools save time by quickly producing a draft transcript and rough timing, which is especially useful for long videos, frequent uploads, or large content libraries. They are ideal for speeding up the workflow, but they should not be treated as final without review, particularly if the content includes specialized terminology, multiple speakers, strong accents, low-quality audio, or important compliance considerations.
Manual captioning gives you much more control over accuracy, phrasing, speaker labels, punctuation, sound descriptions, and timing. It is the stronger option when precision matters most, such as in training videos, legal content, medical content, educational lectures, product instructions, and brand-sensitive marketing videos. The tradeoff is that manual captioning takes more time and attention, especially if you are creating and syncing everything from scratch.
If efficiency matters, a hybrid workflow is usually the smartest choice. Start with automatic captions, correct the text, refine the timing, add meaningful non-speech cues, and then export a clean caption file. This gives you a faster process without sacrificing quality. In other words, automation helps with speed, but human review is what turns captions into something accurate, accessible, and professional.